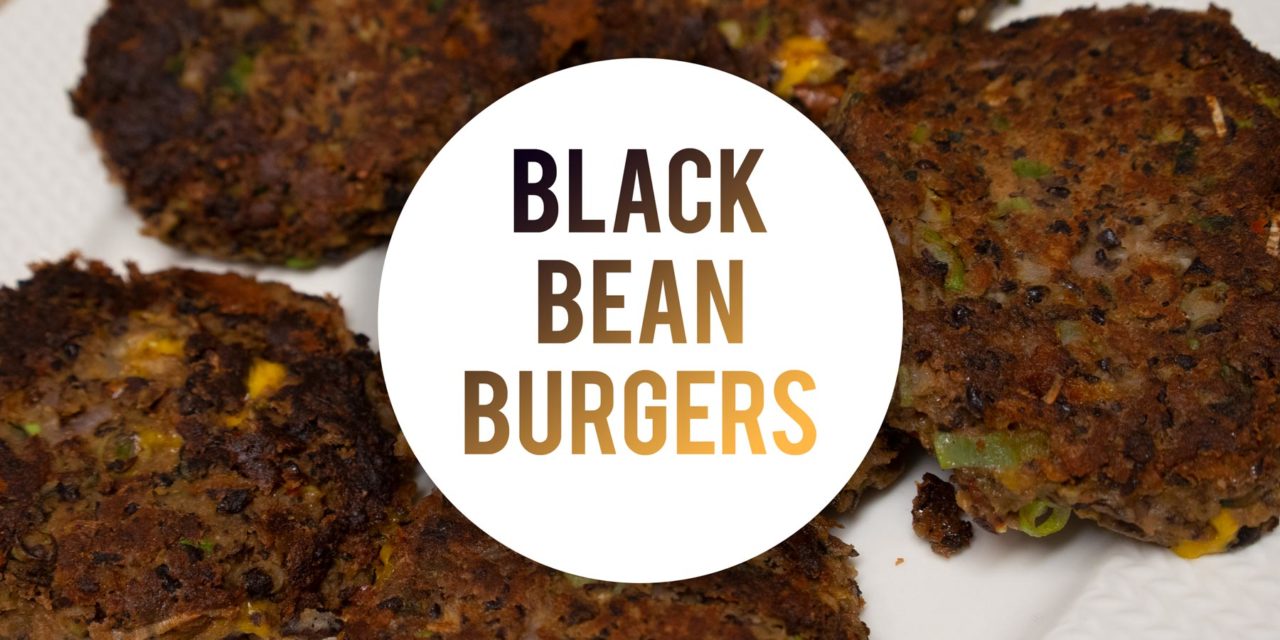
I’m a meat eater, no ifs, ands or buts, about it…but I LOVE me a good black bean burger. There’s something so satisfying about the crunchy outside, and the mushy inside of the perfect black bean burger. This is one of those recipes that’s fully customizable based on what you have laying around your kitchen, and based on your personal preferences. 

This recipe is pretty simple when you break it down. All we’re doing is making a big ‘ole batch of bean mush and forming it into patties. Drying out the beans, sauteeing the veggies, and combining with our raw ingredients and a binder before letting them rest in the fridge for a couple of hours. Nothing fancy here, and the bonus that if you double up the recipe these freeze REALLY well, and you’ll have black bean burgers on demand whenever you want them.

There are just a couple of basic ingredients that need to be involved. 

The Beans

This is kind of obviously the most critical component of the recipe. For years I struggled to figure out why my burgers were too mushy, they were hard to cook right and often fell apart in the pan…no longer thanks to this tip. Dry out the beans by sticking them in the oven for 15 minutes. It’s so easy, just line a baking sheet with foil and back them at 350 for 15 minutes. This causes the beans to dry out, so that when we add in a binder later the mixture isn’t too runny and goopy.

The Glue

Regardless of the kind of beans you’re using or the extra ingredients you pop in to your mix, you’re going to need a binder to bring everything together, and to stop the burgers from falling apart while they’re cooking. This recipe uses egg and bread crumbs. Instead of the egg you could use BBQ sauce or mustard, just keep in mind that the flavor from those sauces will overwhelm the bean mix (not a terrible thing if you want BBQ black bean burgers).

The Others

The beans and the binder are the foundation of this recipe, but they’re just the very very basics of what we can do with this recipe. I used onion, poblano pepper, Buffalo flavored cheese, and scallions to up the flavor of these burgers. You could just as easily use zucchini, sweet potatoes, sun dried tomatoes, or any other of your favorite flavors. The key is to make sure those ingredients are cooked before adding them to the mix, since the burgers cook up pretty quick once they’re formed and cooled.

The Cooking

There’s a necessary step before cooking up the burgers, and that’s to let them rest for a couple hours (or overnight if you want to make them the day before). This gives the bread crumbs time to soak up some of the moisture, and gives the bean patties time to solidify. If you don’t let the burgers rest they’ll be almost impossible to cook up properly, and they’ll most likely fall apart (trust me, at least they’ll still taste good!). I cook these up in a cast iron skillet, but you can use any thicker bottomed pan or a non stick, just get a little canola/veggie/peanut/corn oil in the pan first, and get it hot before you add in the burgers. There’s a trick here to NOT touch the burgers for at least 3 minutes while they’re in the pan, if you do you’ll get more sticking and that makes getting them out of the pan in one piece much much more difficult.

Go Forth and Prosper

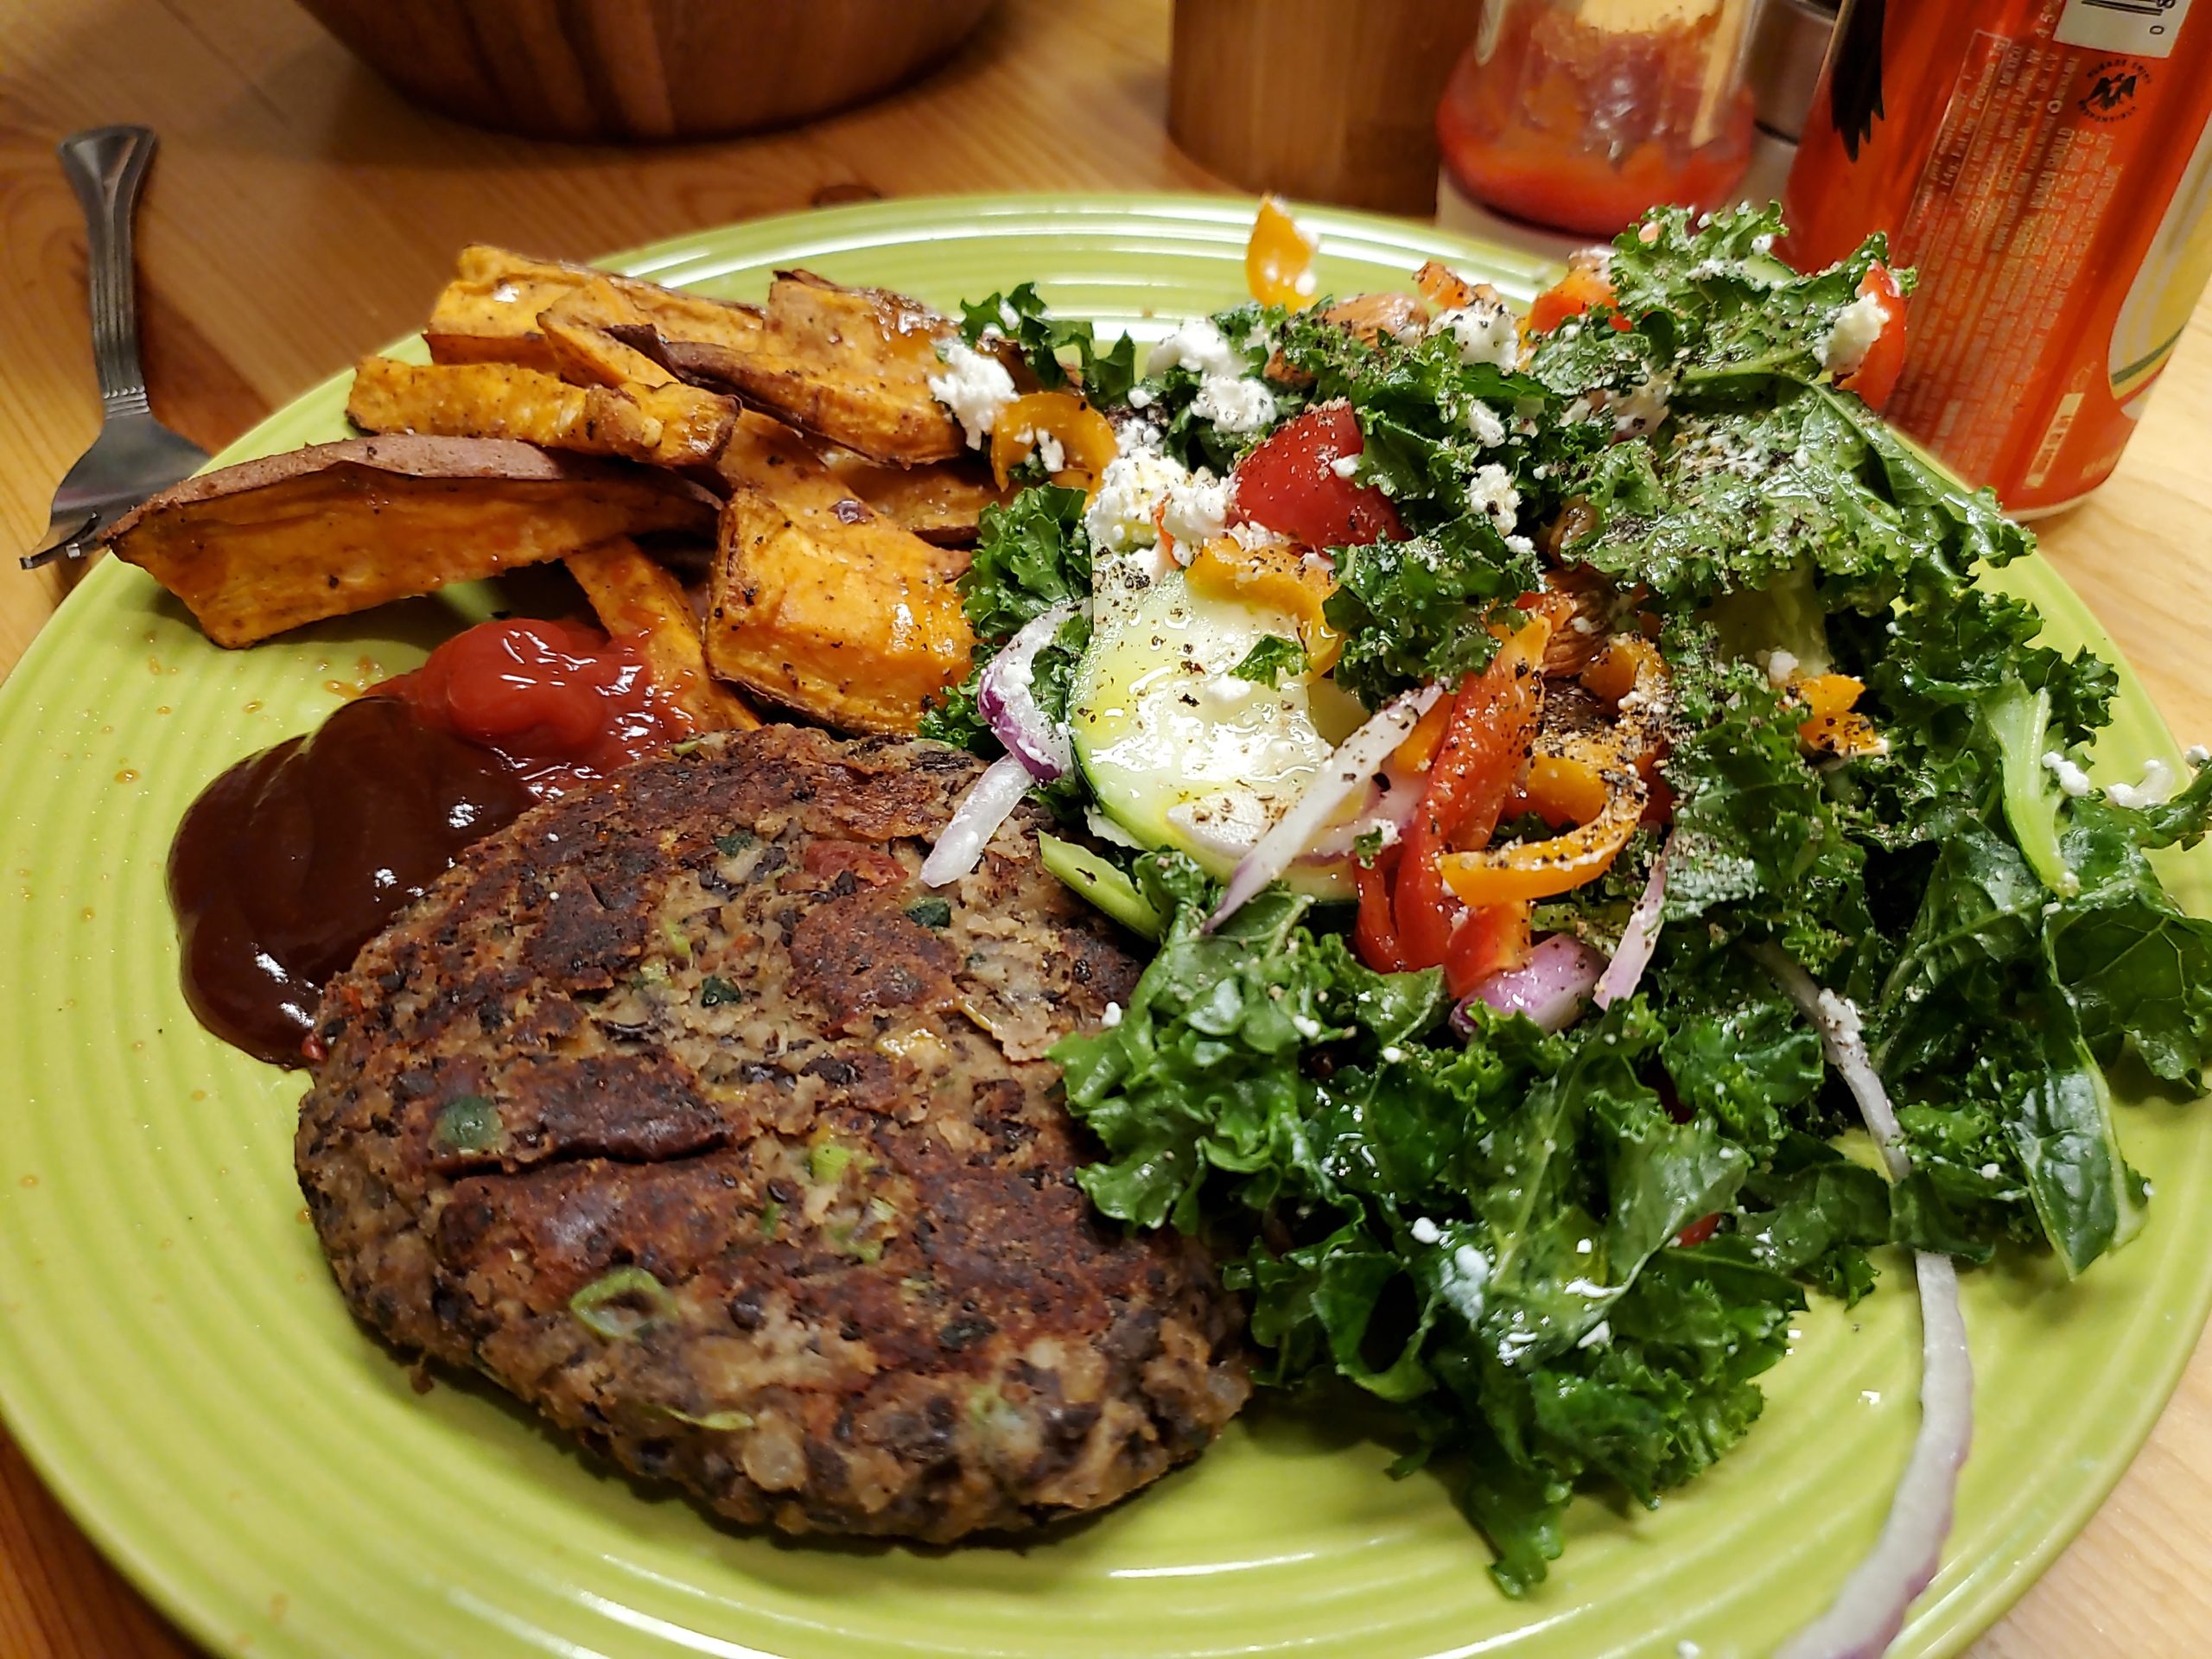
Serve them up with some salad and sweet potato fries. Toss them on a bun with some mustard, onion, and pickles. Freeze them for a rainy day. These Black Bean Burgers are yours to make your own, enjoy….and YumSizzle!

Black Bean Burgers

These Black Bean Burgers are so classic. A little crispy on the outside, a little soft and fluffy on the inside. You're going to be wishing you made a double batch!
Prep Time25 mins
Cook Time15 mins
Resting Time2 hrs
Course: Main Course
Cuisine: American
Keyword: Black Bean, Black Bean Burger, Burger, California, Cheese, Guajillo, Onion, Poblano, Scallion
Servings: 6 Burgers

Equipment

  • Food Processor

Ingredients

  • 2 Cans Black Beans 15.5 oz. canse
  • ½ Red Onion Small Dice
  • 1 Poblano Pepper Small Dice
  • 3.5 oz. Cheese Your Choice
  • 6 Scallions (1 bundle) Chopped/Sliced thin
  • 1 Dried California Pepper Deseeded and thinly sliced
  • 1 Dried Guajillo Pepper Deseeded and thinly sliced
  • ½ tsp Worchestire Sauce
  • 1 tsp Garlic Powder
  • ½ tsp Cumin
  • 1 Egg
  • Cups Bread Crumbs

Instructions

  • Pre-heat oven to 350. While that's getting hot, take a baking sheet and line it with foil. Spray some oil (or drizzle some oil) onto the baking sheet. Open and drain the cans of black beans, put the drained beans on the pan and put them in the oven when it reaches 350. Bake the beans in the oven for 15 minutes, giving them a little mix around after 10 minutes.
  • While the beans are in the oven dice up your onion, poblano pepper, and dried chiles. Cook these ingredients over medium heat in a bit of olive oil and salt and pepper. We're going to cook these veggies for about 10 minutes stirring occasionally, we're looking for everything to be nice and soft with a little bit of browning. Turn down the heat if you're seeing a lot of browning or charring.
  • Once the veggies are in the pan you can prepare the raw ingredients. Wash and thinly slice the scallions, and cube the cheese into small pieces (you could also shred it...I wanted to save on doing extra dishes). Put the raw ingredients aside in a bowl.
  • Once the veggies are soft take them off the heat. After the beans have been in the oven for 15 minutes they should be drier and some of the will have split open (that's exactly what you're looking for). Take the beans and the veggies and pulse them together in your food processor until a chunky mush is formed. This will be the texture of your burgers so go for as long or as short as you want!
  • Empty the processed beans and veg into a large bowl, fold in the raw ingredients and the Worchestire, garlic powder, and cumin. Mix this all together and give it a taste. You'll probably want to add in some extra salt and pepper, and maybe some more Worchestire (or any other spices you like!).
  • When the mix is tasting YumSizzle, now's the time to add in the egg and the breadcrumbs. Crack in the egg, pour in the breadcrumbs, and give that a good mix to incorporate everything. You should end up with a mushy bean mix, but not a runny bean mix, it should be able to hold it's shape fairly well.
  • Line a baking sheet with plastic wrap or parchment paper. We're going to form the patties with our hands to whatever size you like. You could make sliders, I like to make them in standard burger size or to the size of the buns I have around. Grab a handful of the mix, pat it into a circle, and place it on the parchment/plastic lined baking sheet (no need to spray or oil). You might get a little sticky and messy...but that's the fun part! This recipe gets me 6 decent sized burgers. Once you have your burgers formed, cover them with plastic wrap and stick them in the fridge for at least 2 hours.
  • After 2 or more hours it's time to get cooking! The patties will be pretty firm now, and much easier to handle. Get a cast iron, or any thick bottomed or non stick pan on the stove on medium high heat and let it heat up with some neutral oil (I used Canola). When the pan is hot pop in your burgers (no crowding) and let them cook untouched for 3 minutes. Using a spatula lift up one of the burgers and check the bottom to see if it looks nice and crispy and brown (should take 3-5 minutes depending on your heat level). Flip over the burgers and cook the other side (same 3-5 minutes). Serve them with your favorite burger toppings, on a salad, or just eat them as a snack because they're that YumSizzle!